How To Set Up a Remote Database to Optimize Site Performance with MySQL
As your application or website grows, you may come to the point where you've outgrown your current setup. If you are currently hosting your web server and database backend on the same VPS, a good idea may be to separate these two functions so that each can operate and grow on its own machine.
In this guide, we'll discuss how to configure a remote database server that your web server can connect to for dynamic content. We will be using WordPress as an example so that we have something to work with. We'll configure Nginx on our web server and then connect it to a MySQL database on a remote machine. We'll be doing all of this on an Ubuntu 12.04 VPS instance for our demo.
Install MySQL on the Database Server
To get started, we'll configure one VPS instance as the MySQL server. Having our data stored on a separate computer is a good way to expand gracefully when you've hit the ceiling on a one-machine configuration. It also provides the basic structure necessary to load balance and expand your set up even more at a later time.
To get started, we'll need to install some basic packages on our database server. These will basically be most of the same steps you'd take for setting up a database for a traditional LEMP stack, but we won't need all of the components (some will be on the other server).
Start off by updating your package cache and installing the MySQL server:
sudo apt-get update
sudo apt-get install mysql-server
You will be asked to select and confirm a root password for MySQL during the installation procedure.
When you are finished, you need to run the database installation command, which will generate the appropriate directory structure to manage your components.
sudo mysql_install_db
Afterwards, we should tighten up security a little bit by running a script that will ask us about disabling some insecure defaults:
sudo mysql_secure_installation
You will have to enter the MySQL administrator's password that you set in the steps above. Afterwards, it will ask if you want to change that password. Type "N" for no if you're happy with your current password.
To all of the additional questions, you should just hit ENTER to select the default options which will remove some test databases and lock down access.
Configure MySQL to Allow Remote Access
Now that you have your database up and running, we need to change some values to allow connections from other computers.
Open up the main configuration file for MySQL with root privileges in your editor:
sudo nano /etc/mysql/my.cnf
This file is divided into sections denoted by words in brackets ([ and ]). Find the section labeled
mysqld:[mysqld]
Within this section (in the area between this tag and the next section marker), you'll need to find a parameter called
bind-address. This basically tells the database software which network address to listen to connections on.
Currently, MySQL is configured to only look for connections from its own computer. We need to change that to reference an external IP address that your server can be reached at.
If you are hosting this in a datacenter with private networking capabilities, use your server's private network IP. Otherwise, you can use the public IP address here:
bind-address = your_database_IP
Save and close the file when you are finished.
To force MySQL to read the new change that we've just implemented, we can restart the database:
sudo service mysql restart
Set Up Remote WordPress Credentials and Database
Now that we have MySQL configured listening on an external address, we need to create a database and establish a remote user. Even though MySQL itself is now listening on an IP address that other machines can connect to, there are not currently any databases that it can access.
This is also an opportunity for us to establish different privileges based on where a user is connecting from. We can create two "users" that can actually just be the same username, but associated with different hosts.
What I mean by this is that we can create a user that is bound to the database server itself and grant it very broad permissions. We can then use the same username, but associated with our web server and give it only the permissions that WordPress requires.
This will allow us to do heavy duty work while logged into our database server, while only providing our web server with the bare minimum of permissions it needs to accomplish its job. This is a good security policy that will partially shield the database server in the event that the web server is compromised.
Begin by connecting to MySQL using the root account and administrative password you configured:
mysql -u root -p
You will be asked for your MySQL root password and then you'll be given a MySQL prompt.
To get this started, let's create the database that WordPress will use. We will just call this
wordpress so that we can easily identify it in later:CREATE DATABASE wordpress;
Now that we have a database, we need to create our local user, which will be used to do more intense database operations if ever need be. We will call this user
wordpressuser and make this account only match connection attempts originating from the database server itself by using localhost in the declaration:CREATE USER 'wordpressuser'@'localhost' IDENTIFIED BY 'password';
Let's go ahead and grant this account full access to our database:
GRANT ALL PRIVILEGES ON wordpress.* TO 'wordpressuser'@'localhost';
This user can now do any operation on the database for WordPress, but this account cannot be used remotely, as it only matches connections from the local machine.
Let's create a companion account that will match connections exclusively from our web server. For this, you'll need your web server's IP address. We could name this account anything, but for a more consistent experience, we're going to use the exact same username as we did above, with only the host portion modified.
Keep in mind that you must use an IP address that utilizes the same network that you configured in your
my.cnf file. This means that if you used a private networking IP, you'll want to create the rule below to use the private IP of your web server. If you configured MySQL to use the public internet, you should match that with the web server's public IP address.CREATE USER 'wordpressuser'@'web_server_IP' IDENTIFIED BY 'password';
Now that we have our remote account, we can give it the subset of available privileges that WordPress requires to operate under normal circumstances. These are
select, delete, insert, and update.
While this is the final goal, we are actually not able to implement this at this point. This is because during certain operations, you will have to adjust permissions temporarily to allow more access. One of these is actually the initial installation. It is easiest to just grant all privileges at the moment and then we will restrict them after we are finished with the installation.
For reference, the command we will be using to lock down the account (don't worry, we will give you this command again when you need it) is this:
GRANT SELECT,DELETE,INSERT,UPDATE ON wordpress.* TO 'wordpressuser'@'web_server_ip';
But for now, we will temporarily grant all privileges, which makes it effectively identical to the local account for the time being:
GRANT ALL PRIVILEGES ON wordpress.* TO 'wordpressuser'@'web_server_ip';
We will come back to this after we have configured WordPress. If you are not actually installing WordPress and are using this guide simply to learn how to separate your web server from your database, you may be able to use the more restrictive settings now. It depends on your web application, so look up the minimum database privileges needed for your application.
Flush the privileges to write them to disk and begin using them:
FLUSH PRIVILEGES;
Now, you can exit the MySQL prompt by typing:
exit
Test Remote and Local Connections
Before we continue, it's best to verify that you can connect to your database from both the local machine and from your web server using the
wordpressuser accounts.
First, test the connection from your database machine by attempting to log in with our new account:
mysql -u wordpressuser -p
Type in the password that you set up for this account when prompted.
If you are given a MySQL prompt, then the local connection was successful. You can exit out again by typing:
exit
Log into your web server to test remote connections.
On your web server, you'll need to install some client tools for MySQL in order to access the remote database. Update your local package cache, and then install the client utilities:
sudo apt-get update
sudo apt-get install mysql-client
Now, we can connect to our database server using the following syntax:
mysql -u wordpressuser -h database_server_IP -p
Again, you must make sure that you are using the correct IP address for the database server. If you configured MySQL to listen on the private network, enter your database's private network IP, otherwise enter your database server's public IP address.
You should be asked for the password for your
wordpressuser account, and if all went well, you should be given a MySQL prompt.
If this is successful, then you can go ahead and exit out of the prompt, as you've now verified that you can connect remotely.
For an additional check, you can try doing the same thing from a third server to make sure that this other server is not granted access. You have verified local access and access from the web server, but you have not verified that other connections will be refused.
Go ahead and try that same procedure on a server that you did not configure a specific user account for. You may have to install the client utilities as you did above:
mysql -u wordpressuser -h database_server_IP -p
This should not complete successfully. It should throw back an error that looks something like:
ERROR 1130 (HY000): Host '11.111.111.111' is not allowed to connect to this MySQL server
This is what we expect and what we want.
Set Up the Web Server
Now that we have verified that our web server can access the WordPress database, we need to actually make this a web server by configuring Nginx, PHP and the necessary components.
Since you updated your package index to run the test above, we don't need to do that again. Let's install all of the packages we need:
sudo apt-get install nginx php5-fpm php5-mysql
When everything is installed, you can begin configuring the software.
Configure PHP
Let's begin with PHP since that is quite easy.
Open the PHP configuration file for
php-fpm, which will handle our dynamic content. We just need to modify one value in this:sudo nano /etc/php5/fpm/php.ini
Search for the
cgi.fix_pathinfo parameter. It will likely be commented out with the ";" character and set to "1". We need to reverse both of these conditions by uncommenting the line and setting it to "0":cgi.fix_pathinfo=0
This is a security measure. By setting this option, we tell PHP not to try to guess the file that the user was trying to access if an exact match is not found. If we didn't set this, a malicious user could take advantage of this opportunity and get our server to execute code that we don't want it to.
Save and close the file when you are finished.
Next, we'll need to open another file to modify how our PHP processor and web server communicate:
sudo nano /etc/php5/fpm/pool.d/www.conf
Look for the
listen directive, which should be set to 127.0.0.1:9000. Rather than using a port, we're going to set this to a unix domain socket:listen = /var/run/php5-fpm.sock
Save and close the file when you are finished.
Now that we have our values, restart our PHP processor:
sudo service php5-fpm restart
Configure Nginx
Now we're ready to configure Nginx. We can start by copying the default virtual host file to a new file that we can work with. We'll name this after the domain of our site. I'm going to use the placeholder "example.com":
sudo cp /etc/nginx/sites-available/default /etc/nginx/sites-available/example.com
Now, open the file we just copied over:
sudo nano /etc/nginx/sites-available/example.com
Inside, we'll modify our server block (the sections contained withing the
serverbrackets). Begin by uncommenting the directive to listen to port 80. We're also going to change the root directory and make Nginx serve a PHP index file by default:server {
listen 80;
root /var/www/example.com;
index index.php index.hmtl index.htm;
Next, we'll modify the
server_name directive to use our domain name, ensure that our try_files is set up correctly (passing requests to PHP if no files are found) and that our error pages are configured:server {
listen 80;
root /var/www/example.com;
index index.php index.hmtl index.htm;
server_name example.com;
location / {
try_files $uri $uri/ /index.php?q=$uri&$args;
}
error_page 404 /404.html;
error_page 500 502 503 504 /50x.html;
location = /50x.html {
root /usr/share/nginx/www;
}
Finally, we need to set up the actual PHP processing by using a location block that will match all of our PHP requests. We will immediately return a 404 if an exact match is not found. We'll also use the socket we configured for PHP:
server {
    listen 80;
    root /var/www/example.com;
    index index.php index.hmtl index.htm;
server_name example.com;
location / {
try_files $uri $uri/ /index.php?q=$uri&$args;
}
error_page 404 /404.html;
error_page 500 502 503 504 /50x.html;
location = /50x.html {
root /usr/share/nginx/www;
}
location ~ \.php$ {
try_files $uri =404;
fastcgi_pass unix:/var/run/php5-fpm.sock;
fastcgi_index index.php;
include fastcgi_params;
}
}
This is the end of our server block configuration. Save and close the file.
Now, we link this to our "enabled" directory and remove the link for the default server block file:
sudo rm /etc/nginx/sites-enabled/default
sudo ln -s /etc/nginx/sites-available/example.com /etc/nginx/sites-enabled/
Restart Nginx to make these changes happen:
sudo service nginx restart
Install WordPress
Now that we have our web server set up with PHP processing and we have a database server, we need to install an application to take advantage of this and connect out to our database. As you know by now, we're using WordPress to demo this functionality in this tutorial.
Download the latest WordPress tarball to your home directory:
cd ~
wget http://wordpress.org/latest.tar.gz
Extract the files, which will create a directory called "wordpress" in your home directory:
tar xzvf latest.tar.gz
WordPress includes a sample configuration file, but it is not in place out-of-the-box. We will rename this file so that it will be read correctly and then we can open it in our text editor to make our changes:
cp ~/wordpress/wp-config-sample.php ~/wordpress/wp-config.php
nano ~/wordpress/wp-config.php
Inside, we need to enter the correct values for our remote database. Remember to use the same IP address you used in your remote database test earlier.
/** The name of the database for WordPress */
define('DB_NAME', 'wordpress');

/** MySQL database username */
define('DB_USER', 'wordpressuser');

/** MySQL database password */
define('DB_PASSWORD', 'password');

/** MySQL hostname */
define('DB_HOST', 'database_server_ip');
Close the file when you are finished. This is actually the only part of the entire configuration that explicitly links our web server and database server.
Next, we'll need to create the directory structure that we set up in our Nginx server block configuration. If you recall, I'm using "example.com" for my demonstration, but you should use whatever you specified in your Nginx configuration:
sudo mkdir -p /var/www/example.com
We will then copy the files and directories found in our
~/wordpress directory to the new document root that we just created:sudo cp -r ~/wordpress/* /var/www/example.com
Now all of our files are in place. The only thing left to do is modify our permissions and file ownership a little bit. We should start by moving into our server's document root:
cd /var/www/example.com
We are going to give all of the files in this directory to our web server user, which is called
www-data:sudo chown -R www-data:www-data *
We still want to be able to edit these files as our normal, non-root user though, so we can add our regular, non-root account on our web server to the web server group. We can then give that group permissions to modify files in this directory:
sudo usermod -a -G www-data your_user
sudo chmod -R g+rw /var/www/example.com
Set Up the Site through the Web Interface
Now, all you need to do is complete the installation through the web interface.
Navigate to your domain name (or public IP address) associated with your web server:
http://example.com
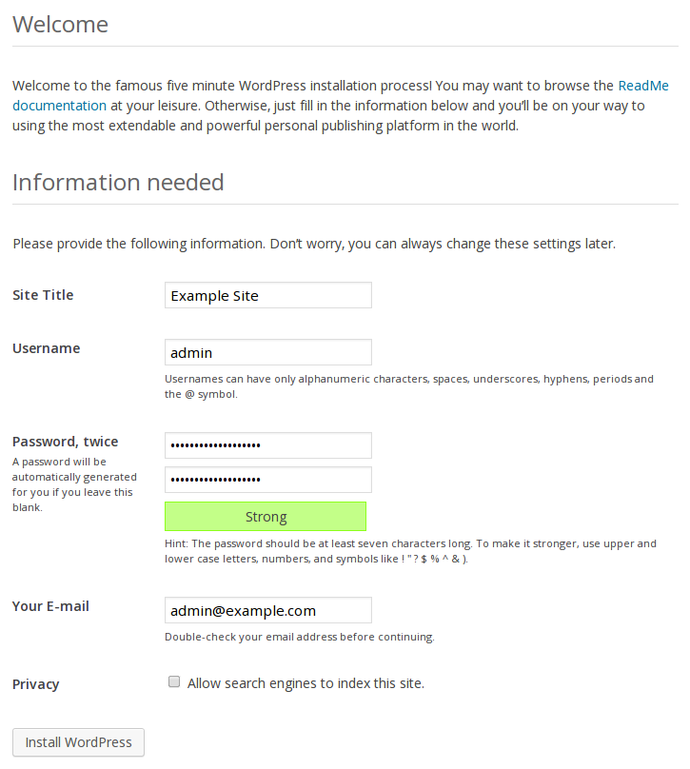
You should see the WordPress installation screen where you need to fill out your relevant information:
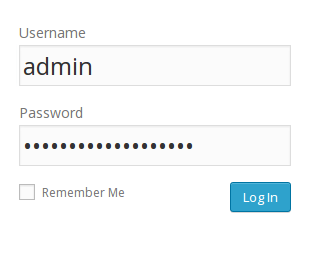
Once you have set your configuration, you will need to log into the application using the account you just created:
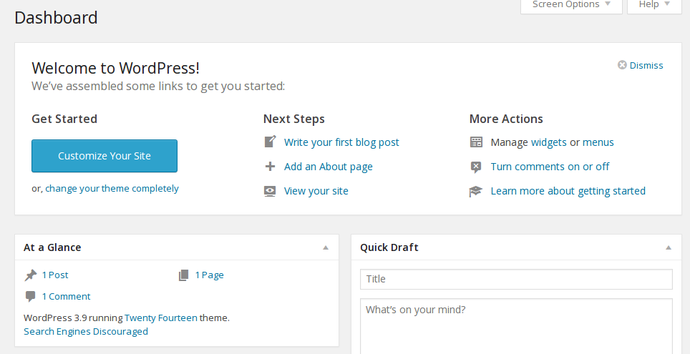
You will be taken to the administration dashboard, where you can get started configuring your site:
Restrict Remote Database Permissions
When you are finished configuring your WordPress, you should go back and revoke some of your privileges for your remote database user.
Most of the database privileges are not needed for daily operation and will only need to be enabled during updates or with plugin installations. Keep this in mind in case you get an error when performing administrative actions after taking these steps.
Certain plugins may also require additional privileges. Investigate each plugin to see what it requires and consider choosing plugins that requires the least amount of additional access.
Log into your database server. Afterwards, log into MySQL using the MySQL root account:
mysql -u root -p
Type your password to gain access to the prompt.
You can see the current permissions of your remote user by typing:
show grants for 'wordpressuser'@'web_server_IP';
+---------------------------------------------------------------------------------------------------------------------------+
| Grants for wordpressuser@xx.xxx.xxx.xxx                                                                                   |
+---------------------------------------------------------------------------------------------------------------------------+
| GRANT USAGE ON *.* TO 'wordpressuser'@'xx.xxx.xxx.xxx' IDENTIFIED BY PASSWORD '*5FD2B7524254B7F81B32873B1EA6D681503A5CA9' |
| GRANT ALL PRIVILEGES ON `wordpress`.* TO 'wordpressuser'@'xx.xxx.xxx.xxx'                                                 |
+---------------------------------------------------------------------------------------------------------------------------+
2 rows in set (0.00 sec)
The "usage" permission actually means no real privileges, so we don't have to worry about that. The second privilege line is the one that we set initially, allowing all privileges on the
wordpress database.
The procedure for applying new privileges that are more restrictive than the current privileges is actually two steps.
First, we need to revoke all of the current privileges. Do this by typing something like this:
REVOKE ALL PRIVILEGES on wordpress.* FROM 'wordpressuser'@'web_server_IP';
If we ask for the current grants now, we'll see that the second line is gone:
show grants for 'wordpressuser'@'web_server_IP';
+---------------------------------------------------------------------------------------------------------------------------+
| Grants for wordpressuser@10.128.213.175                                                                                   |
+---------------------------------------------------------------------------------------------------------------------------+
| GRANT USAGE ON *.* TO 'wordpressuser'@'xx.xxx.xxx.xxx' IDENTIFIED BY PASSWORD '*5FD2B7524254B7F81B32873B1EA6D681503A5CA9' |
+---------------------------------------------------------------------------------------------------------------------------+
1 row in set (0.00 sec)
Now, we can add the privileges that we would like back to the account. We need
UPDATE, INSERT, SELECT, and DELETE privileges for day-to-day usage:GRANT SELECT,DELETE,INSERT,UPDATE ON wordpress.* TO 'wordpressuser'@'web_server_ip';
If we check again, we can see our granular privileges are now set.
To tell MySQL to re-read the privileges table to implement our changes, we can type:
FLUSH PRIVILEGES;
Afterward, exit out of MySQL again:
exit.
Conclusion
If you were following along, you should now have a good understanding of how to get a remote database talking with your application. While we went over some WordPress-specific steps, the general idea, especially those related to MySQL configuration and user privileges, are applicable in most remote MySQL situations.