How To Install DokuWiki with Nginx on an Ubuntu 12.04 VPS
Wiki-style documentation has grown in popularity over the past decade. Community-editable documentation projects offer a system that can distribute the workload among contributors, can be made publicly or privately accessible, and can scale easily.
There are many different wiki applications that each have their strengths depending on your needs. One choice is DokuWiki, which is a very light-weight wiki that can be set up easily. DokuWiki uses a simple file format to store its data, so it does not require you to maintain a database. This makes migrating and scaling trivial.
In this guide, we will discuss how to install DokuWiki with an Nginx server on an Ubuntu 12.04 VPS.
Install Nginx and PHP
As we mentioned above, DokuWiki does not rely on a database like many wikis do. As such, we can forego installing MySQL, MariaDB, PostgreSQL, or other relational database management systems and simply install and configure our web server and processing language.
Install the Web Server
For our web server, we are selecting Nginx. Nginx is easy to install and configure once you are familiar with its syntax. It is also very lightweight, which matches well with our DokuWiki software.
We can find Nginx in Ubuntu's default repositories. Install it now, with apt:
sudo apt-get update
sudo apt-get install nginx
We can then start the server by issuing this command:
sudo service nginx start
Visit your droplet's IP address or domain name in your browser to see the default Nginx page.
server_ip_or_domain

This verifies that the web server is installed and functioning properly.
Install and Configure PHP
DokuWiki is written in PHP, so we will need to install some components to get this to work well. Unlike Apache, Nginx does not include a module that can handle PHP processing, so instead, it offloads that work onto a separate, dedicated component.
We can install this from apt as well. We will also install a library that will allow our PHP files to process images directly:
sudo apt-get install php5-fpm php5-gd
We need to tighten up some security on the service so that when a request is made for a PHP file that does not exist, the processor does not simply execute other files that may be similar.
Open up the configuration file with root privileges:
sudo nano /etc/php5/fpm/php.ini
Search for and adjust the
cgi.fix_pathinfo parameter so that it reads like this:cgi.fix_pathinfo=0
Save and close the file when you are done.
Next, we'll change our PHP processor to look for connections using a socket instead of a port on our local interface. Open this file with root privileges:
sudo nano /etc/php5/fpm/pool.d/www.conf
Look for the
listen directive and change it to use a socket file:listen = /var/run/php5-fpm.sock
Save and close the file.
Now, configuration on the PHP side is complete. Restart the service to implement the changes we made:
sudo service php5-fpm restart
Configure Nginx
Although we have set up our PHP processor, we have not yet told Nginx to pass PHP requests to that processor. We will have to configure this and some details specific to our DokuWiki installation.
Begin by opening the Nginx default server block file with root privileges:
sudo nano /etc/nginx/sites-available/default
With the comments stripped, this file looks something like this:
server {
    root /usr/share/nginx/www;
    index index.html index.htm;

    server_name localhost;

    location / {
        try_files $uri $uri/ /index.html;
    }

    location /doc/ {
        alias /usr/share/doc/;
        autoindex on;
        allow 127.0.0.1;
        deny all;
    }
}
We will be modifying this significantly. First, we want to tell it to listen to port 80 at the top. You can simply uncomment that line from the file:
server {
    listen 80;

    root /usr/share/nginx/www;
    index index.html index.htm;
. . .
Next, we need to fix the indexing to look for a PHP index file first, before trying to find HTML files, when a directory is requested:
server {
    listen 80;

    root /usr/share/nginx/www;
    index index.php index.html index.htm;
. . .
We should change the name of the server from
localhost to the domain name or IP address associated with your server. This will allow it to correctly match web requests:. . .
root /usr/share/nginx/www;
index index.php index.html index.htm;
server_name server_domain_or_IP_address;
location / {
. . .
We can comment out the documentation section, since this is configured at the moment to only accept requests originating from the server itself anyways.
We will want to enable some error handling. These lines should already be in your file, and you can simply uncomment them:
. . .
    # location /doc/ {
    #     alias /usr/share/doc/;
    #     autoindex on;
    #     allow 127.0.0.1;
    #     deny all;
    # }

    error_page 404 /404.html;

    error_page 500 502 503 504 /50x.html;
    location = /50x.html {
        root /usr/share/nginx/www;
    }
. . .
Under the error section, you can set a location block that will hand off our PHP files to our processor. This is somewhat already present in the commented out section, but you should take care to configure it correctly.
In particular, we have a
try_files directive that goes along with our PHP configuration choice to discard PHP files that are not exact matches. We also set a fastcgi_param directive to pass the correct script name to our processor to execute.. . .
location ~ \.php$ {
try_files $uri =404;
fastcgi_pass unix:/var/run/php5-fpm.sock;
fastcgi_index index.php;
fastcgi_param SCRIPT_FILENAME $document_root$fastcgi_script_name;
include fastcgi_params;
}
. . .
Below this, we will find another commented out block that we can uncomment. This will ignore the
.htaccess files used by Apache to implement per-directory configuration since Nginx does not use these.
In addition, we will take this opportunity to add an additional block that denies access to a number of directories that DokuWiki uses internally, but which should not be accessible from the web:
. . .
    location ~ /\.ht {
        deny all;
    }

    location ~ /(data|conf|bin|inc)/ {
        deny all;
    }
}
This should bring you to the end of our configuration file. At this point, your file should look similar to this file:
server {
    listen   80;

    root /usr/share/nginx/www;
    index index.php index.html index.htm;

    server_name server_domain_or_IP_address;

    location / {
        try_files $uri $uri/ /index.html;
    }

    error_page 404 /404.html;

    error_page 500 502 503 504 /50x.html;
    location = /50x.html {
        root /usr/share/nginx/www;
    }

    location ~ \.php$ {
        try_files $uri =404;
        fastcgi_pass unix:/var/run/php5-fpm.sock;
        fastcgi_index index.php;
        fastcgi_param SCRIPT_FILENAME $document_root$fastcgi_script_name;
        include fastcgi_params;
    }

    location ~ /\.ht {
        deny all;
    }

    location ~ /(data|conf|bin|inc)/ {
        deny all;
    }
}
Save and close the file.
Now, we need to restart our web server to implement our new configuration:
sudo service nginx restart
Test PHP Processing on our Server
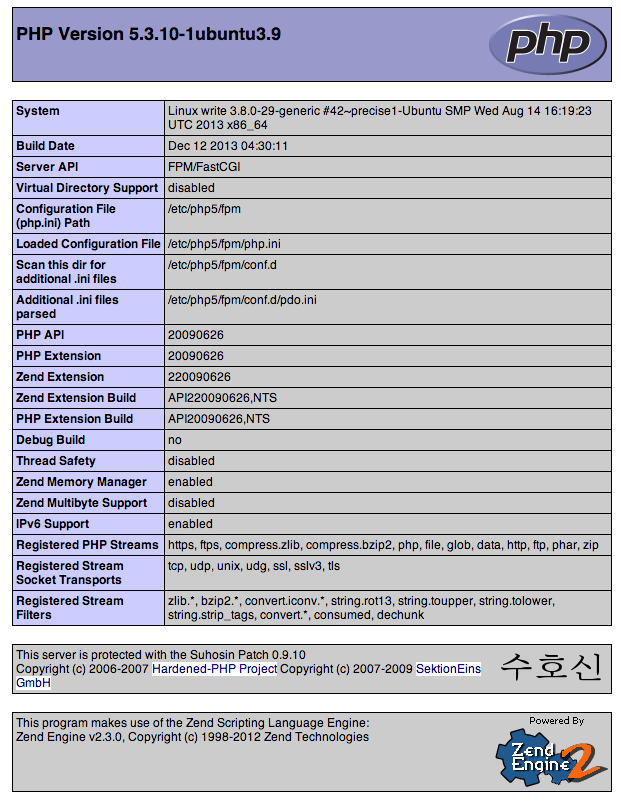
Before we begin the actual DokuWiki configuration, we need to make sure that our server can actually handle PHP files.
If we have not configured our server correctly, our PHP files will simply be downloaded instead of processed. This is certainly not what we want.
To begin, let's create a PHP test file in our server's document root (
/usr/share/nginx/www). This file will contain a simple PHP function that displays information about our server:sudo sh -c 'echo "<?php phpinfo(); ?>" > /usr/share/nginx/www/info.php'
Now, all we have to do is access this file in our web browser by typing our domain name or IP address followed by the path "/info.php":
server_domain_or_IP_address/info.php
If you have configured everything correctly, your PHP script should execute, displaying a page that looks something like this:
If this works correctly, we can remove the file we created and move on to the actual wiki installation:
sudo rm /usr/share/nginx/www/info.php
Install and Configure DokuWiki
Now that we have our web server and PHP processor set up correctly, we can download and install DokuWiki.
In your user's home directory, we can download the latest stable version of DokuWiki by typing these commands:
cd ~
wget http://download.dokuwiki.org/src/dokuwiki/dokuwiki-stable.tgz
This will download a tarball into your current directory. Extract the directory structure by typing:
tar xzvf dokuwiki-stable.tgz
We can now delete the tarball by typing:
rm dokuwiki-stable.tgz
Let's change the name of the directory to whatever path we'd like to access our wiki from. We will use
wiki for this guide:mv doku* wiki
We should move our directory into our web root. This will allow us to access our server by typing our domain followed by
/wiki. Move the directory now:sudo mv wiki /usr/share/nginx/www/
Before we continue, we need to do some additional security steps, or the installer will complain that it cannot access certain areas. Change to the directory you just moved:
cd /usr/share/nginx/www/wiki
The web process needs to have certain access to some files and directories within the wiki structure.
sudo chown -R www-data data
sudo chown www-data lib/plugins/
sudo chown www-data conf
Now, we are ready to install DokuWiki through the web browser using an installer script.
In your browser, go to your domain or IP address followed by the wiki sub directory and
install.php:server_domain_or_IP_address/wiki/install.php
You will be presented with the DokuWiki installation page:
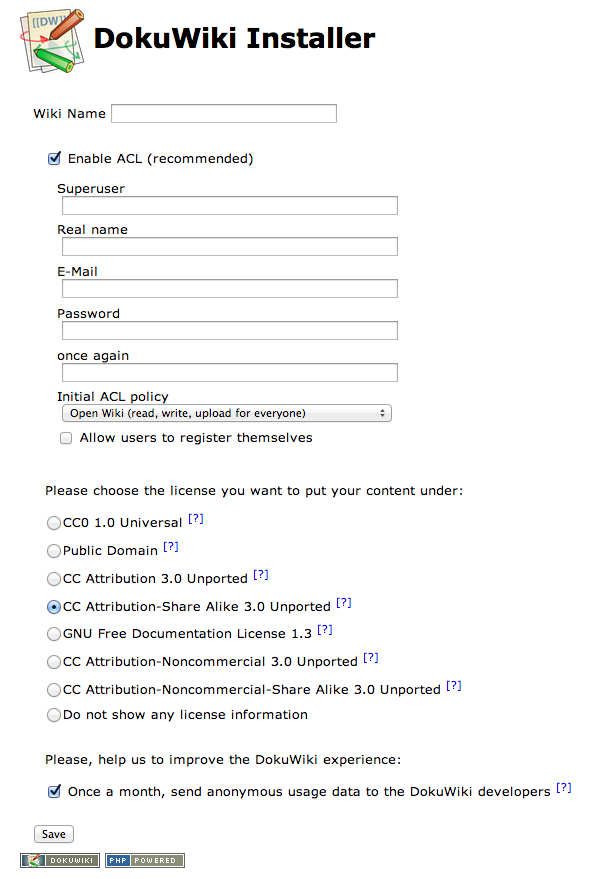
This is the only configuration page that you need to fill out to get started. Come up with a title and create an administrative account.
One thing to be to be aware of is the ACL policy that you set up. This will decide how people are able to access your wiki:

Click on the "Save" button at the bottom when you are finished.
At this point, your wiki is installed. You should remove the installation script for additional security. On your server, type:
sudo rm /usr/share/nginx/www/wiki/install.php
Conclusion
You should now have a wiki set up and running on your system. DokuWiki can be easily extended and themed using plugins and templates respectively. Adding content and configuring your site is easy by logging into an administrative account and implementing changes through the interface.
look at this site dog dildo,horse dildo,realistic dildo,vibrators,vibrators,sex toys,custom sex doll,male sex dolls,horse dildo look at these guys
ReplyDeleten007p9jlcxl777 horse dildo,dog dildo,realistic dildo,Butterfly Vibrator,wholesale sex toys,vibrators,dildo,love dolls,sex chair e615n3ragtz233
ReplyDeletes766i5yrhhx159 male sex doll,dildos,double dildos,realistic dildos,dildos,vibrators,sex chair,sex chair,dog dildos a621s6liyms811
ReplyDeletem303k3rlibd257 wolf dildo,dog dildo,sex toys,sex dolls,sex chair,couples sexy toys,vibrators,sex chair,dildos p012n0cjwgp512
ReplyDelete